
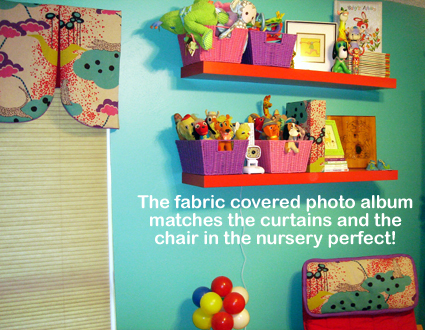
I was determined to actually have pictures of Tallulah printed up and put in a photo album rather than tucked away in a folder on my computer like all my other pictures. What if my computer crashes one day? That being the case I whipped up a perfectly coordinated album to match her nursery. Today for I Love to Create learn how easily you can too!
SUPPLIES
Aleene’s Liquid Fusion Glue
Aleene’s Fabric Fusion Glue
Photo Album
Craft Felt
Fabric
Rick Rack
Clothes Pins
Hunt and Gather
Round up your supplies. The most important thing is to make sure the photo album you purchased is a ring binder style with a solid spine so that it will be easy to cover with fabric.
Cut
If your album with open and lay flat, center the opened album over your fabric design then cut around it leaving a three inch margin all the way around. If your album won't lay flat, measure the total distance from the edge of the front around the spine and to the edge of the back. Then measure the height of the album. Add a total of six inches to each of these two measurements and cut a rectangle from your fabric with these measurements.
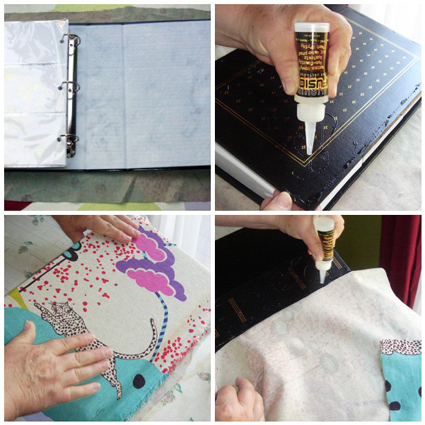
Glue
Using your Liquid Fusion Glue lightly coat one side of the photo album. Careful not to use too much glue or leave big blobs as it can darken your fabric darken.
Smooth
On one side at a time, glue and smooth your fabric into place. Don’t forget the spine.

Corners
Once you have your fabric adhered to the front side of your album it is time to finish off the inside. Start by using your Liquid Fusion glue to adhere all four corners of the fabric to the inside covers of the album. Use clothes pins to hold the corners in place while the glue dries.
Edges
Once all four corners are glued into place do the sides. This process is similar to wrapping a present. Fold them over, glue them in place and use clothes pins to hold them until dry.
Felt
Next measure your felt so that it is big enough to cover the glued fabric edges on the inside of the front and back covers. Use a butter knife to shove the edges of the felt under the spine to get a nice finished edge.
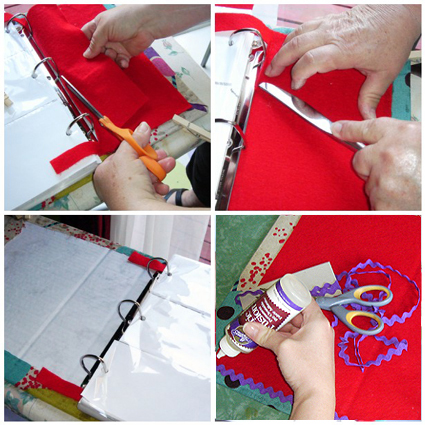
Tabs
Be sure on one of the two sides of craft felt to leave two small tabs that will go across the very top and bottom of the album.
Rick Rack
Once the felt is glued into place and drying, feel free to embellish further. Go back in with Fabric Fusion glue and add rick rack or trim around the inside edges or glue on more embellishments on the outside.
Have you covered anything in fabric? We would love to know.
More Fabric Covered Fun:
Fabric Covered Boxes - Country Living has a fun tutorial on trinket boxes.
Fabric Covered Bracelet - A fun jewelry project using scraps and tape rolls.
Fabric Covered Drawer Pulls - Good Housekeeping Magazine has an easy tutorial.
Fabric Covered Journal - Score yourself a handmade fabric covered journal from Naughty Secretary Club.
Fabric Covered Switch Plates - Pink Chalk has the cutest switch plate project ever! Making one to match the nursery ASAP!
Fabric Covered Headboards - Cookie Magazine shows you how to easily customize a headboard. P.S. Check out the one I made for my bedroom!
Fabric Covered Picture Frame - Martha Stewart has a simple how-to. Check out her fabric covered flower pots too!
Customized Fabric Covered Button Bracelet - Use any image on your own button bracelet. Also check out How About Orange's tut on making buttons into magnets!
Fabric Covered Kitchen Cabinets - These might get dirty from greasy fingers eventually, but dang are they cute.
That's a lovely idea - in years to come, the fabric will remind you (and Tallulah) of her in the nursery, when she's long grown out of it.
ReplyDeleteI really like this Jen!
ReplyDeleteWhat a great idea. Definitely make a few of these while Tallulah is still not very demanding :)
ReplyDeleteI LOVE her room decor by the way.
What a beautiful nursery! I am borderline-obsessed with photo album covering. Here are two that I've done for my two-year-old:
ReplyDeletehttp://prettypartridge.blogspot.com/search/label/photo%20albums
Can you elaborate on what the tabs are for? Do you glue them down? I can follow all of it except that part. Thank you,
ReplyDeleteDarcy
The metal ring binder portion of the album doesn't go all the way to the top and bottom. That leaves a little gap that needs to be covered by the felt tabs. If your ring binder extends all the way to the edge then those felt tabs won't be necessary.
ReplyDelete